Y'all are amazing with these top-notch recipes and helpful tips. It shows you care about us home bakers.
Bread Machine Milk and Honey Bread Recipe
Recipes > American Recipes > American Bread Machine Recipes
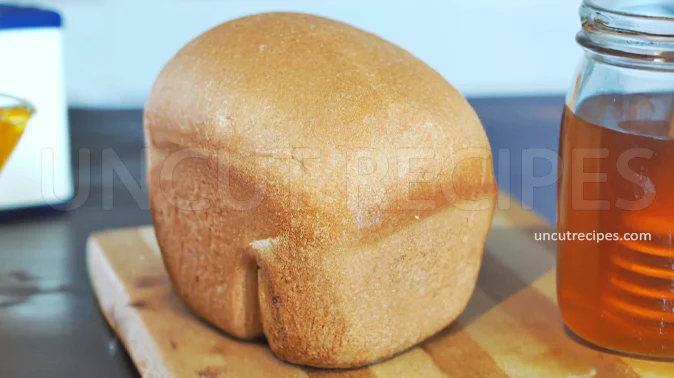
Milk and honey - two ingredients that have long stood the test of time, known for their wholesome goodness and comforting flavors. When combined, they work in harmony to create a bread that’s both luxuriously soft and subtly sweet. Think of it as nature's way of treating us to a delightful taste experience.
This Bread Machine Milk and Honey Bread not only captures the essence of these two classic ingredients but also offers the satisfaction of making something truly homemade.
With just a few simple steps, you'll have a loaf that sings with a golden hue and delicate taste. Perfect for both morning toasts and evening snacks, this bread promises a slice of simple joy in every bite. Ready to dive into baking goodness? Let’s get started!
JUMP TO:
INGREDIENTS:
Bread Flour: Bread flour has a higher protein content than all-purpose flour, which translates to better gluten formation and a chewier bread texture. For this recipe, it's crucial to maintain that structure. Ideally, opt for unbleached bread flour; bleaching might affect the flour's protein structure. If you're considering a specific brand, check the protein content; ideally, it should be between 12% to 14%.
Milk - Fat Content and Pasteurization: The milk's fat content contributes to the bread's softness and flavor. Whole milk is a great choice, but if you're looking to control the fat content, consider a 2% variant. Avoid using ultra-pasteurized milk if possible, as the high heat of ultra-pasteurization can sometimes affect the bread's final texture. If you don't have fresh milk, reconstituted powdered milk or a milk substitute like almond or oat milk can be used, though flavor profiles may slightly vary.
Honey - Raw vs. Processed: Honey imparts sweetness and moisture to the bread. Opt for raw honey as it retains more of its natural flavors and enzymes than heavily processed variants. Darker honeys like buckwheat or forest honey offer richer flavors, while lighter ones like acacia or clover are milder. If honey isn't at hand, maple syrup or agave nectar can serve as alternatives, but they'll impart their distinct flavors.
Active Dry Yeast Storage and Viability: Active dry yeast is essential for the bread's rise. Always check the expiration date. Yeast stored in a cool, dry place or better yet, in the fridge, tends to last longer. Before adding it to your recipe, test its viability by dissolving a teaspoon in warm water with a pinch of sugar. If it bubbles up in 10 minutes, it's active and good to use. If you only have instant yeast on hand, you can use it too, but the quantity might vary slightly (generally, you'd use about 25% less instant yeast than active dry).
MAIN STEPS:
Temperature of Ingredients: For recipes that involve yeast, temperature matters. Cold ingredients can slow down or even halt yeast activity. Ensure your milk and butter are at room temperature. This helps the yeast function optimally, resulting in a consistent rise.
Honey and Streamlined Incorporation: When adding honey to your bread machine, drizzle it in slowly. Honey is dense and can sometimes settle at the bottom if poured in too quickly. To facilitate easier mixing in the machine, consider warming the honey slightly so it becomes more fluid. This ensures even distribution throughout the dough.
Optimal Integration of Butter: It's not just about throwing the butter in. Consider softening it first or cutting it into small chunks. This assists the bread machine in combining it evenly with the other ingredients, ensuring there are no buttery clumps in your finished bread.
Yeast, Avoiding Direct Contact with Salt: Although the bread machine will mix everything together, it's a known fact that direct contact with salt can impede yeast activity. To sidestep this, create a small well in the flour and add your yeast there, placing the salt around the periphery. While this might seem like a minor detail, it’s these nuances that can affect the final rise and texture of your bread.
Monitoring the Dough, Assessing Hydration: Every bread machine and environment can vary. During the initial mixing stage, peek inside. If the dough appears too sticky, add a tablespoon of bread flour. If too dry, add a tablespoon of milk. Achieving the right hydration ensures the bread's crumb is neither too dense nor too airy.
SERVED WITH:
Starter: Labneh (Lebanon): A thick, tangy yogurt cheese often drizzled with olive oil and sprinkled with herbs. The creamy texture and slight tanginess of labneh beautifully contrast the sweetness of the milk and honey bread.
Side Dish: Butternut Squash Soup (USA): A velvety, creamy soup made from pureed butternut squash, onions, and spices. The subtle sweetness of the squash complements the honey undertones in the bread.
Main Course: Moroccan Chicken Tagine (Morocco): A rich stew made with chicken, preserved lemons, olives, and a blend of spices, cooked in a special clay pot called a tagine. The bread can be used to scoop up the flavorful sauce.
Salad: Beet and Goat Cheese Salad (France): Roasted beets paired with creamy goat cheese, arugula, and a balsamic reduction. The earthiness of the beets and the tang of the goat cheese balance the bread's sweetness.
Dessert: Ricotta and Honey Spread (Italy): Creamy ricotta cheese drizzled with honey and topped with toasted pine nuts. Served as a spread for the milk and honey bread, it makes for a simple yet indulgent dessert.
Cake: Pistacchio Financiers (France): Small, buttery cakes made with ground Pistacchio and brown butter. Their nutty flavor profile makes for a lovely contrast with the sweet notes of the bread.
Drink: Chai Latte (India): A fragrant tea made by brewing black tea with spices like cardamom, cloves, and ginger, then mixing it with steamed milk and sweetening with honey. The warm spices and honey in the chai latte perfectly mirror the flavors in the bread.
ALTERNATIVES:
Course: Challah (Israel): A beautifully braided, slightly sweet, and golden loaf typically baked for the Jewish Sabbath. Made with flour, eggs, water, yeast, and often sweetened with honey, its soft texture is a joy to eat.
Course: Brioche (France): A rich and tender bread made with a good amount of butter, eggs, and sometimes milk. It's lightly sweetened and can be enjoyed on its own, or as a base for many desserts and savory sandwiches.
Course: Honeycomb Buns (Southeast Asia): Also known as Beehive buns, these are sweet, fluffy buns arranged in a pattern resembling a honeycomb. They're glazed with honey or sugar syrup and often have fillings like custard or sweetened coconut.
Course: Pulla (Finland): A lightly sweetened cardamom bread often braided or shaped into rolls. It's typically enjoyed during breakfast or coffee breaks and has a distinct aromatic flavor from cardamom.
Course: Tsoureki (Greece): A sweet and fragrant Easter bread flavored with mastic and mahleb, giving it a unique taste. The bread is often braided and decorated with red-dyed eggs.
Course: Roti Paung (Malaysia): Soft, buttery buns that are mildly sweet. They are often served as breakfast or tea-time treats and can be paired with a variety of spreads or curries.
Course: Pan de Leche (Philippines): Literally translating to "milk bread," these are soft, fluffy rolls sweetened with sugar and often topped with bread crumbs. They're a common breakfast or snack option in the Philippines.
HISTORY:
Milk and honey have been intertwined in the annals of history, often used together in both food and religious contexts. The Biblical "land flowing with milk and honey" epitomizes the idea of prosperity and abundance. Both these ingredients were precious in ancient cultures and symbolized nourishment and sweetness.
Breads using milk and honey as key ingredients can be traced back to many ancient civilizations, where they were often reserved for special occasions due to the ingredients' inherent value. Honey, with its natural sweetness and preservative qualities, and milk, adding a soft, tender crumb to the bread, became a preferred combination for celebratory breads in various cultures.
Fast forward to the late 20th century, the bread machine's invention ushered in a new era of home baking. As these machines gained popularity, many traditional recipes were adapted for this new method. Among them, the Milk and Honey Bread found its automated variant, bringing a touch of ancient luxury into modern homes with minimal effort.
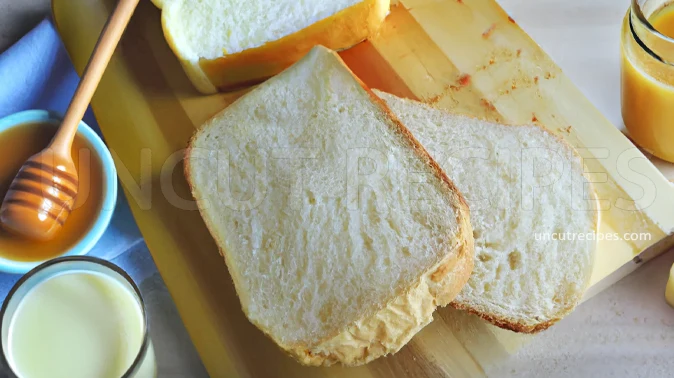
In today's world, where artisanal breads and a return to traditional baking methods are becoming increasingly popular, the Milk and Honey Bread from a bread machine provides a middle ground. It gives a nod to ancient traditions while using modern technology to make the process approachable for everyone.
For many, the soft, subtly sweet loaf acts as a reminder of family gatherings, childhood memories, or simply the joy of enjoying a slice of warm, freshly baked bread, embodying comfort in every bite.
TIPS:
Flour Selection: To prevent your bread from becoming too dense, it's recommended to use bread flour instead of all-purpose flour in a bread machine.
Honey: Invest in good quality, preferably organic or raw honey. The quality and origin of honey will influence the flavor profile of your bread.
Tangzhong Method: This method, originating from Asian baking techniques, makes bread fluffier and extends its shelf life.
Method: Create a roux by combining a part of the milk and bread flour (approximately 1:5 ratio) in a pan. Heat it gently while stirring until it thickens to a paste. Let it cool and then incorporate it into the bread recipe.
Natural Fermentation: Long fermentation develops deeper flavors and a better crumb structure.
Method: Reduce the amount of active dry yeast slightly. Mix all ingredients except salt, and let it rest (autolyse) for a longer period, about 12-16 hours at a cool temperature. After this, add salt and proceed.
Butter Incorporation Technique: This method ensures more even distribution of fat throughout the dough, giving a more consistent crumb and texture.
Method: Instead of adding softened butter directly, try creaming it with a bit of flour to form a paste. Add this butter-flour paste after the initial mixing of ingredients.
Recipe Information
Skill Level
|
Time 3h 30 Minutes |
Price
|
Serves 6 People |
| Healthiness |
Nutritional Information |
| Ratings (Add Rating & Review) |
Reviews 14 Reviews |
Ingredients:
-
3 cups Bread Flour
1 cup + 1 tablespoon Milk
3 tablespoons Honey
3 tablespoons Butter
( melted )
1.5 teaspoons Salt
2 teaspoons Active Dry Yeast
Allergens
| Dairy | Gluten |
Directions:
01 - Begin by laying out all the ingredients you'll need for this delicious recipe. It's always a good idea to have everything within arm's reach.
02 - Carefully measure and then pour each ingredient into the pan of your bread machine. Make sure you're following the specific order recommended by the manufacturer of your bread machine – this ensures everything mixes and bakes just right.
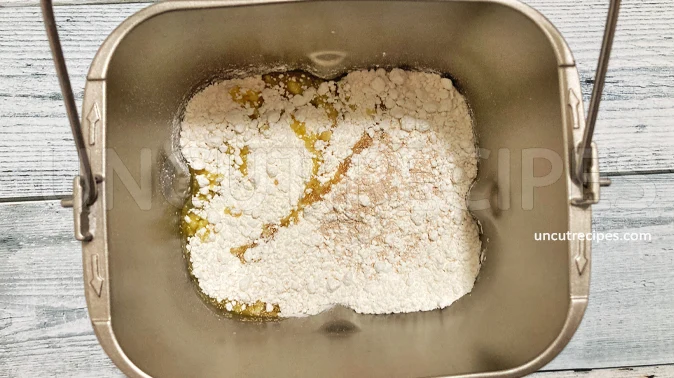
Setting Up the Bread Machine:
03 - On your bread machine's settings, select the 'basic' or 'white bread' option. Additionally, go ahead and choose the 'medium crust' setting to achieve that golden hue and crisp texture.
04 - After making sure all the settings are correct, press the 'start' button to begin the bread-making magic!
Finishing Touches:
05 - When the delightful aroma fills the air and the machine indicates it's done, promptly take out the hot loaf. It's crucial to not let it sit inside the machine for too long as this can cause the bread to become too moist or soggy. Instead, place your freshly baked bread on a wire rack, letting it cool down to room temperature.
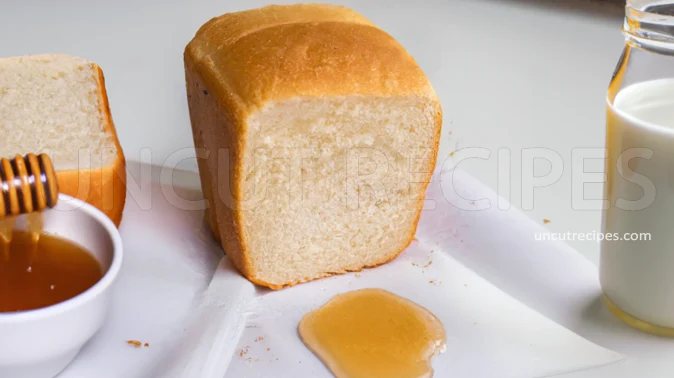
06 - After it's cooled down, use a sharp bread knife to slice your Milk and Honey Bread into even pieces. Serve it right away to enjoy its freshness, or store it in a bread box or container to savor later. Enjoy every bite!
Notes:
Milk Temperature: Use lukewarm milk, as it will help activate the yeast effectively. Cold milk might delay the yeast action, whereas hot milk can kill the yeast.
Honey Alternative: If you run out of honey or want a different flavor profile, maple syrup or agave nectar can be used as replacements. However, it's essential to note that this might slightly alter the taste of the bread.
Butter Substitution: Margarine or shortening can be used in place of butter. For a dairy-free version, coconut oil or a neutral-tasting oil like canola can be a substitute.
Machine Monitoring: Occasionally check the dough's consistency during the initial kneading stage. If it appears too sticky, a sprinkle of flour can help, and if too dry, a splash of milk.
Storing the Bread: For optimal freshness, wrap the cooled bread in plastic wrap or aluminum foil and store it in an airtight container or bread box. Consume within 2-3 days for best quality.
Freezing for Longer Shelf Life: If you wish to keep the bread longer, consider freezing it. Pre-slice the bread, separate slices with parchment paper, and store in a freezer-safe bag. This way, you can easily grab as many slices as you need without thawing the entire loaf.
Serving Suggestions: Given the sweet undertones of this bread, it pairs wonderfully with jams, nut butters, or even just a simple spread of butter. For a savory twist, try it with cream cheese and smoked salmon.
Nutritional Information
( Per Portion )
|
Calories |
210 kcal (10.5%) |
| Total Carbohydrate | 38g (13%) |
| Cholesterol | 15mg (5%) |
|
Total Fat |
4.5g (7%) |
| Saturated Fat | 2.5g (13%) |
| Polyunsaturated Fat | 0.5g |
| Monounsaturated Fat | 1g |
| Trans Fat | 0.2g |
| Fibers | 1.2g (5%) |
| Protein | 6g (12%) |
| Sugar | 10g (40%) |
|
Vitamin A |
150 IU (3%) |
|
Vitamin B1 (Thiamin) |
0.35mg (23%) |
| Vitamin B2 (Riboflavin) | 0.15mg (9%) |
| Vitamin B3 (Niacin) | 4mg (20%) |
| Vitamin B5 (Pantothenic Acid) | 0.4mg (8%) |
| Vitamin B6 | 0.05mg (3%) |
| Vitamin B7 (Biotin) | 2mcg (1%) |
| Vitamin B9 (Folate) | 30mcg (8%) |
| Vitamin B12 | 0.1mcg (4%) |
| Vitamin C | 0.1mg (0.2%) |
| Vitamin D | 0.08 IU (0.17%) |
| Vitamin E | 0.5mg (3%) |
| Vitamin K | 1mcg (1%) |
| Choline | 15mg (3%) |
| Carnitine | 0.5mg |
|
Calcium |
50mg (5%) |
|
Chloride |
100mg (2%) |
| Chromium | 2mcg (6%) |
| Copper | 0.1mg (5%) |
| Fluoride | 5mcg (0.1%) |
| Iodine | 5mcg (3%) |
| Iron | 2mg (11%) |
| Magnesium | 15mg (4%) |
| Manganese | 05mg (25%) |
| Molybdenum | 5mcg (11%) |
| Phosphorus | 100mg (10%) |
| Potassium | 100mg (3%) |
| Selenium | 10mcg (18%) |
| Sodium | 550mg (23%) |
| Sulfur | 50mg |
| Zink | 0.5mg (5%) |
* Percent Daily Values are based on a 2,000 calorie diet. Your daily values may be higher or lower depending on your calorie needs.
** Nutrient information is available for all ingredients in this recipe. Amount is based on available nutrient data collected from all over the internet.
(-) Information is not currently available for this nutrient. If you are following a medically restrictive diet, please consult your doctor or registered dietitian before preparing this recipe for personal consumption. |
| Written by: Uncut Recipes | Disclaimer |









September 22, 2023
It's the first time I've seen a recipe that tells you to warm the milk before using. That's a game-changer! Much appreciated!